반응형
안녕하세요? 오늘은 HA Core 를 Docker 에 설치했을 경우, 업데이트 하는 방법을 알아보겠습니다.
1. 컨테이너 삭제
하기 명령으로 컨테이너를 삭제합니다.
root@debian:~# docker ps
CONTAINER ID   IMAGE                                 COMMAND                  CREATED       STATUS                 PORTS     NAMES
007b4c9c31bf   koenkk/zigbee2mqtt                    "docker-entrypoint.s…"   8 weeks ago   Up 6 weeks                       z2m
8cba3407dd3c   homeassistant/home-assistant:latest   "/init"                  8 weeks ago   Up 9 days                        hass

root@debian:~# docker stop hass
hass

root@debian:~# docker rm hass
hass
2. 이미지 업데이트
하기 명령으로 이미지를 업데이트 합니다.
root@debian:~# docker pull homeassistant/home-assistant:latest
latest: Pulling from homeassistant/home-assistant
801bfaa63ef2: Already exists
6ab2fca6d540: Pull complete
1f40989841bf: Download complete
6ecc14977d05: Download complete
754f9402f284: Download complete
bb189d51dda5: Downloading  42.58MB/49.9MB
d75c09442f39: Download complete
c2d70974cc2a: Download complete
e0532a0712ea: Download complete
10556f40181a: Waiting
2ece47ab7513: Waiting
ab43563f33ec: Waiting
d1862a2c28ec: Waiting
18fd307a599f: Waiting
c27e42f532e7: Waiting
cd8d37c8075e: Waiting
0465ae924726: Waiting
23a88f52941a: Waiting
a2e14cd7ceee: Waiting
0e6d4703614a: Waiting
a1b1c84af5d8: Waiting
3. 컨테이너 재실행
하기 명령으로 재실행합니다.
root@debian:~# docker run -d --name hass --restart=always -v /etc/localtime:/etc/localtime:ro -v /opt/hass/config:/config -v /media:/media:ro --privileged --network host homeassistant/home-assistant:latest
e0b416b5b2b054f0cf5cbee417b4f73125df8217ad64751fa70d54df9565ee42
root@debian:~# docker ps
CONTAINER ID   IMAGE                                 COMMAND                  CREATED         STATUS                 PORTS     NAMES
e0b416b5b2b0   homeassistant/home-assistant:latest   "/init"                  7 seconds ago   Up 6 seconds                     hass
007b4c9c31bf   koenkk/zigbee2mqtt                    "docker-entrypoint.s…"   8 weeks ago     Up 6 weeks                       z2m

4. yeelightbt 설치
저는 yeelight 무드등의 블루투스 버전을 사용하고 있습니다. 따라서 파이썬 모듈을 설치해야합니다.
하기 명령으로 컨테이너 쉘에 진입하여 설치를 진행하면 make 관련과 c 라이브러리가 없어서 빌드에 실패할 것입니다.
root@debian:~# docker exec -it hass /bin/bash
bash-5.0# pip install git+https://github.com/rytilahti/python-yeelightbt/
Collecting git+https://github.com/rytilahti/python-yeelightbt/
  Cloning https://github.com/rytilahti/python-yeelightbt/ to /tmp/pip-req-build-yyhh8att
Collecting bluepy
  Downloading bluepy-1.3.0.tar.gz (217 kB)
     |████████████████████████████████| 217 kB 1.3 MB/s
Requirement already satisfied: construct in /usr/local/lib/python3.8/site-packages (from python-yeelightbt==0.0.4) (2.9.45)
Requirement already satisfied: click in /usr/local/lib/python3.8/site-packages (from python-yeelightbt==0.0.4) (7.1.2)
Building wheels for collected packages: python-yeelightbt, bluepy
  Building wheel for python-yeelightbt (setup.py) ... done
  Created wheel for python-yeelightbt: filename=python_yeelightbt-0.0.4-py3-none-any.whl size=11665 sha256=dcd1fa96f58babd4e1761742332a5eac65462d32c922b0c3195bfff451364d5b
  Stored in directory: /tmp/pip-ephem-wheel-cache-cq0zuhjz/wheels/a9/2e/1a/9d766b73af29410a2ff79dc367717751536ce3d1f1b2a48470
  Building wheel for bluepy (setup.py) ... error
  ERROR: Command errored out with exit status 1:
   command: /usr/local/bin/python -u -c 'import sys, setuptools, tokenize; sys.argv[0] = '"'"'/tmp/pip-install-u7kz1o59/bluepy/setup.py'"'"'; __file__='"'"'/tmp/pip-install-u7kz1o59/bluepy/setup.py'"'"';f=getattr(tokenize, '"'"'open'"'"', open)(__file__);code=f.read().replace('"'"'\r\n'"'"', '"'"'\n'"'"');f.close();exec(compile(code, __file__, '"'"'exec'"'"'))' bdist_wheel -d /tmp/pip-wheel-gr5fqtqc
       cwd: /tmp/pip-install-u7kz1o59/bluepy/
  Complete output (6 lines):
  running bdist_wheel
  running build
  running build_py
  Working dir is /tmp/pip-install-u7kz1o59/bluepy
  execute make -C ./bluepy clean
  error: [Errno 2] No such file or directory: 'make'
  ----------------------------------------
  ERROR: Failed building wheel for bluepy
따라서 하기 패키지를 추가하고 빌드를 파이썬 모듈 설치를 진행합니다.
bash-5.0# apk add build-base glib-dev
(1/13) Installing binutils (2.34-r1)
(2/13) Installing libmagic (5.38-r0)
(3/13) Installing file (5.38-r0)
(4/13) Installing isl (0.18-r0)
(5/13) Installing libatomic (9.3.0-r2)
(6/13) Installing libgphobos (9.3.0-r2)
(7/13) Installing gcc (9.3.0-r2)
(8/13) Installing musl-dev (1.1.24-r10)
(9/13) Installing libc-dev (0.7.2-r3)
(10/13) Installing g++ (9.3.0-r2)
(11/13) Installing fortify-headers (1.1-r0)
(12/13) Installing patch (2.7.6-r6)
(13/13) Installing build-base (0.5-r2)
Executing busybox-1.31.1-r19.trigger
OK: 343 MiB in 181 packages
그러면 하기와 같이 빌드가 정상적으로 진행됩니다.
bash-5.0# pip install git+https://github.com/rytilahti/python-yeelightbt/
Collecting git+https://github.com/rytilahti/python-yeelightbt/
  Cloning https://github.com/rytilahti/python-yeelightbt/ to /tmp/pip-req-build-8h9prziv
Collecting bluepy
  Using cached bluepy-1.3.0.tar.gz (217 kB)
Requirement already satisfied: construct in /usr/local/lib/python3.8/site-packages (from python-yeelightbt==0.0.4) (2.9.45)
Requirement already satisfied: click in /usr/local/lib/python3.8/site-packages (from python-yeelightbt==0.0.4) (7.1.2)
Building wheels for collected packages: python-yeelightbt, bluepy
  Building wheel for python-yeelightbt (setup.py) ... done
  Created wheel for python-yeelightbt: filename=python_yeelightbt-0.0.4-py3-none-any.whl size=11665 sha256=6ac6def840be3f490209caaf61fbf6dc2aaaf11e023711b19393e3931a060935
  Stored in directory: /tmp/pip-ephem-wheel-cache-h_wg6q1v/wheels/a9/2e/1a/9d766b73af29410a2ff79dc367717751536ce3d1f1b2a48470
  Building wheel for bluepy (setup.py) ... done
  Created wheel for bluepy: filename=bluepy-1.3.0-cp38-cp38-linux_x86_64.whl size=601511 sha256=c91824e1648552e45e4152003eb64f164f27cd90cb393174d6157997359680a3
  Stored in directory: /root/.cache/pip/wheels/ae/52/54/2b125a9bf67f82c81b99fa31f198d14a67b78304522c0a9ece
Successfully built python-yeelightbt bluepy
Installing collected packages: bluepy, python-yeelightbt
Successfully installed bluepy-1.3.0 python-yeelightbt-0.0.4
WARNING: You are using pip version 20.2.4; however, version 21.0.1 is available.
You should consider upgrading via the '/usr/local/bin/python -m pip install --upgrade pip' command.
5. HACS
저는 Core 버전에서는 HACS를 사용하지 못하는것으로 알았는데 가능하다고 하여 한번 시도해 보았습니다.
bash-5.0# wget -q -O - https://hacs.xyz/install | bash -
INFO: Trying to find the correct directory...
INFO: Found Home Assistant configuration directory at '/config'
INFO: Changing to the custom_components directory...
INFO: Downloading HACS
Connecting to github.com (15.164.81.167:443)
Connecting to github.com (52.78.231.108:443)
Connecting to github-releases.githubusercontent.com (185.199.108.154:443)
saving to 'hacs.zip'
hacs.zip             100% |*******************************************************| 77300  0:00:00 ETA
'hacs.zip' saved
INFO: Creating HACS directory...
INFO: Unpacking HACS...
INFO: Removing HACS zip file...
INFO: Installation complete.

INFO: Remember to restart Home Assistant before you configure it
상기와 같이 설치를 하고 재시작을 해보겠습니다.
먼저 진입한 컨테이너 환경에서 밖으로 나옵니다.
bash-5.0# exit
exit
root@debian:~# docker restart hass
hass
재시작 하고 브라우저로 접속 한 다음, CTRL F5 를 통해 브라우저 캐쉬를 초기화 해줍니다. 이걸 하지 않으면 메뉴에 보이지 않을 수 있다고 하네요.
그리고 통합구성요소로 이동한 다음, 통합 구성요소 추가를 누릅니다.
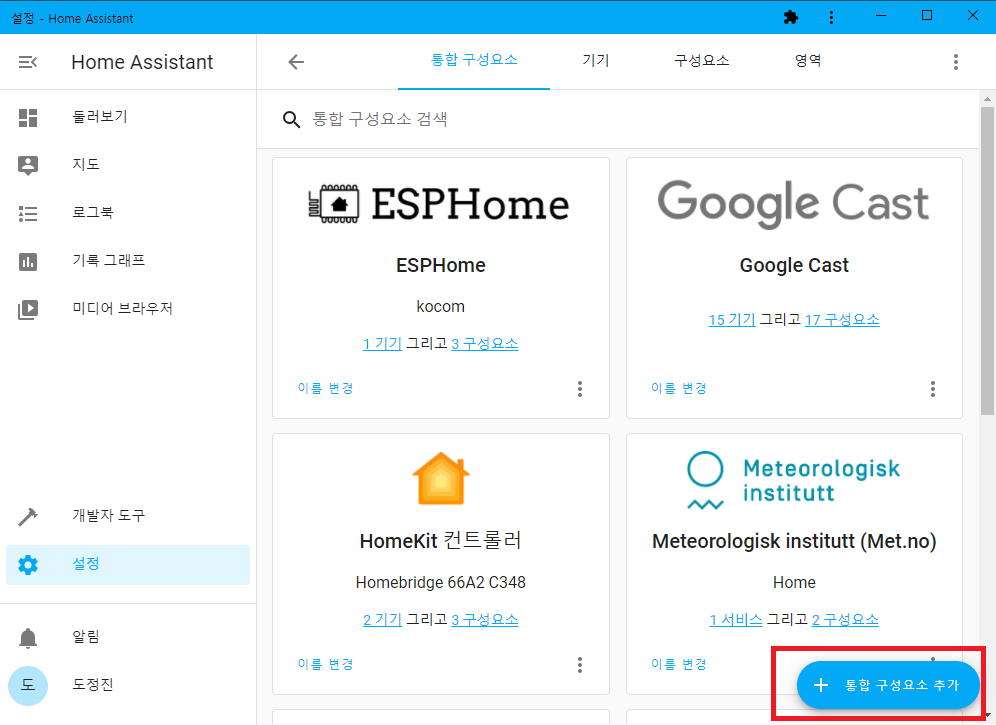
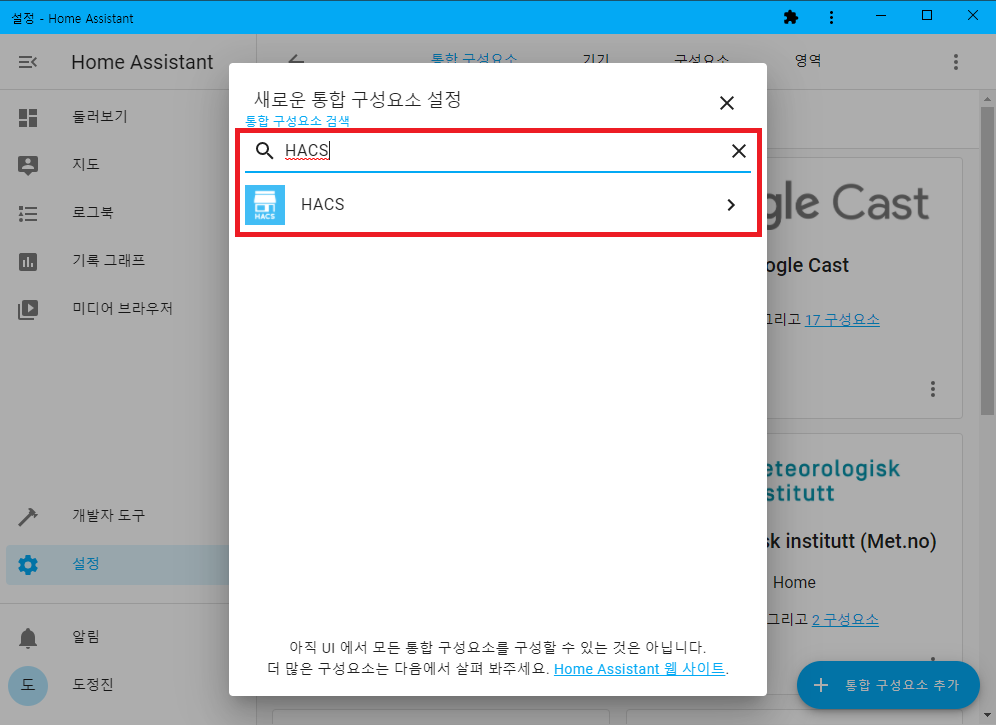

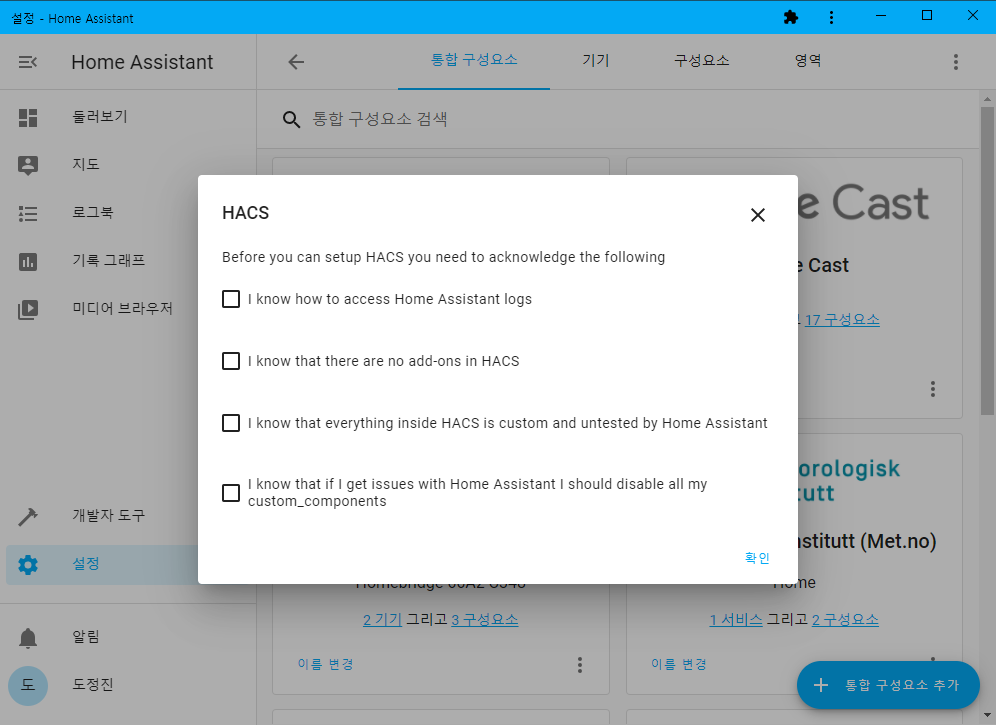
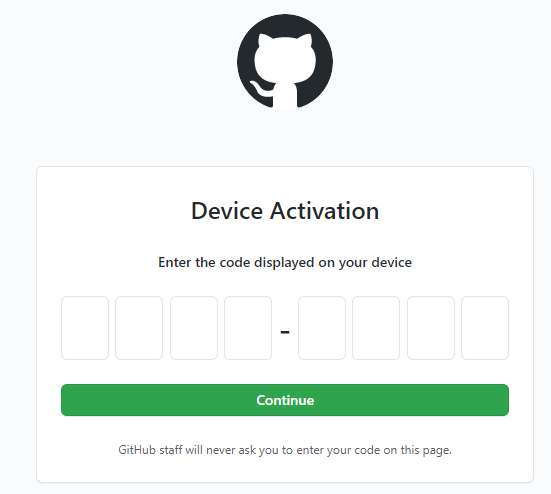
깃 허브에 로그인을 하라고 나오네요. 코드로 로그인 해줍니다.



하기와 같이 추가가 되었습니다.
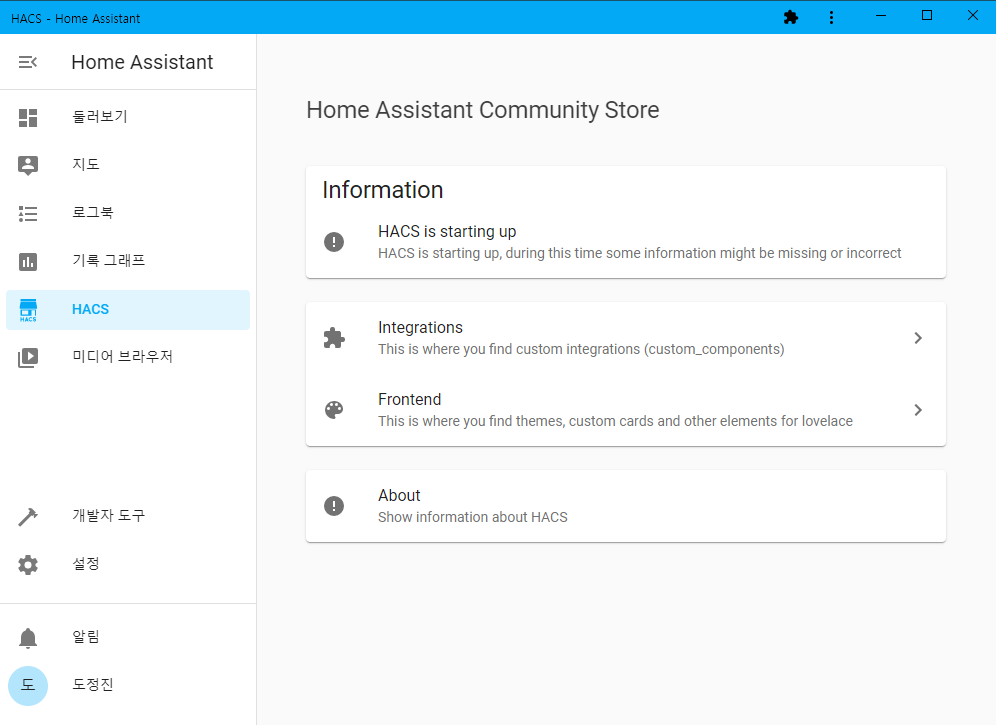
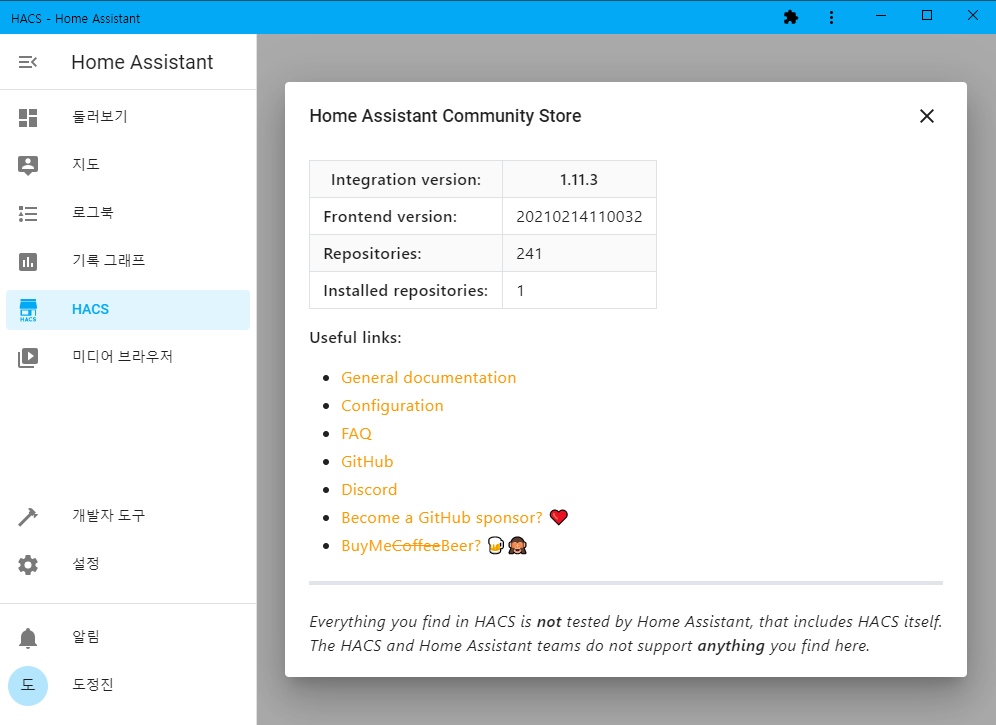

이때까지 파일을 넣고 빼고 불편하게 했던 방법들이 쉽게 처리가 될 수 있을것 같습니다.
감사합니다.
반응형
'IoT' 카테고리의 다른 글
| Orange Pi Zero IOT 보드 치명적 문제 + CC2538 (405) | 2021.03.20 |
|---|---|
| OrangePi Zero IOT 보드 테스트 (422) | 2021.03.20 |
| 샤오미 히터 한번 킬때 0.5KWh 만 사용 자동화 (HomeAssistant) (0) | 2020.12.13 |
| 오피스텔 / 원룸 / 홈 IOT 구축기 (정리) (1) | 2020.12.07 |
| Homeassistant 샤오미 난로 (za2) 연동하기 (feat. Homebridge) (0) | 2020.12.06 |


댓글